 17 Apr 2025
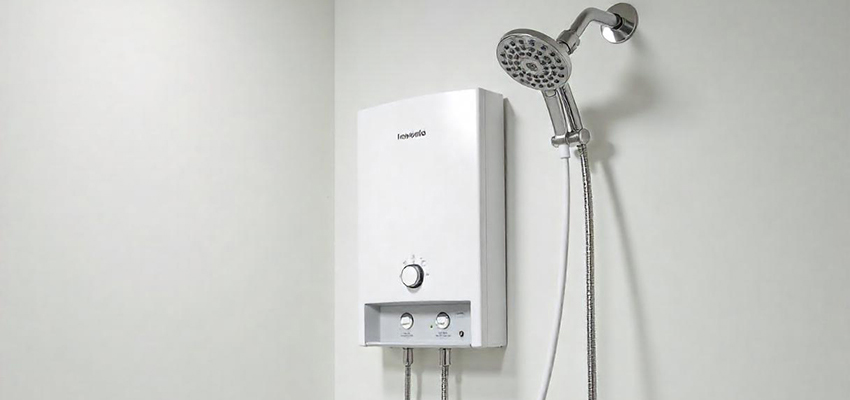
Installing a water heater brings you warm water whenever you need it which makes it a key part of your home. When you set it up the right way, it runs smoother, lasts longer and stays safe. But if you put it in the wrong way, it might drip, waste power or even cause danger.
Whether you fix it yourself or ask an expert who knows the right steps and make it simple. This guide will help you to install your heater safely and correctly.
Why a Good Installation Matters
A well-installed heater saves power, works smoothly, and avoids sudden breakdowns. Poor water heater installation can lead to water heater leaking, low water pressure, or higher electricity bills
This guide will walk you through the most important steps to make sure your heater runs well from day one.
1. Pick the Right Type and Size
Choose the Right Size
If your heater is too small, it may run out of hot water fast. If it’s too big, it may waste energy. Choose the right size based on your home’s needs.
Storage Water Heater Guide:
- 10–15 litres: Best for one or two people.
- 25–40 litres: Works for a family of three or four.
- 50 litres and more: Needed for large families.
For DIY water heater installation, check the flow rate of an instant heater to ensure it meets household demand.
2. Find the Best Spot
Keep It in a Safe and Open Area
The heater should be placed where air moves freely. This helps prevent overheating.
- Instant heaters should be mounted on strong walls. Weak walls may break under the weight.
- Storage heaters should be easy to access for maintenance and water heater repair.
Short Distance to the Tap
If the heater sits too far from the tap, then hot water moves slowly to it which consumes more time and wastes energy.
Follow Safety Rules
Some places have rules about how high a heater can be placed or how much space it needs. Check these before installing.
3. Use Strong Pipes and Good Water Flow
Choose the Best Pipes
The right pipes help water flow smoothly and prevent water heater leaking.
- Copper pipes: Long-lasting and heat-resistant.
- Stainless steel pipes: Look nice but may need extra covering to keep heat inside.
- PVC pipes: They work for cold water but are not safe for hot water.
Check the Water Pressure
Too much pressure may damage the heater. Too little may result in weak water flow. A pressure valve helps keep it balanced.
Avoid Sharp Bends in Pipes
Excessive twists in pipes slow water flow. Keep the pipeline as straight as possible to maintain efficiency in your DIY water heater installation.
4. Plan for Drainage
Use a Drain Pan
A drain pan sits under the heater and catches leaks, protecting your floor.
Connect a Drain Pipe
A good drainage system helps remove extra water safely.
- The pipe should tilt downward to help water flow out.
- It should be kept clear of dirt or blockages.
- Water should drain in a safe place to avoid damage.
5. Attach Electrical or Gas Connections Safely
Electric Heaters
- Use proper wiring for the heater’s power level
- Ground the wires correctly to prevent electric shocks
- Install a circuit breaker to prevent power overloads
Gas Heaters
- Place the heater in an open area to avoid gas buildup
- Test for gas leaks using soapy water—bubbles mean a leak
- Keep the heater away from anything that can catch fire
If you don’t know how to handle gas lines then call a professional to complete the job safely.
6. Add Important Safety Parts
Use a Pressure Valve
A pressure relief valve prevents the heater from building too much pressure.
- Attach it firmly to avoid leaks.
- Connect a pipe to carry extra water away safely.
Install a Stopcock Valve
A stopcock lets you turn off water to the heater when needed. This makes repairs easier and prevents leaks from getting worse.
7. Test the Heater Before Using It
Flush Out the Pipes
Run water through the system to remove dust or dirt that may have collected inside.
Look for Leaks
Check all pipes, joints, and valves for any signs of water heater leaking. Address small drips before they escalate into major problems.
Turn It on Slowly
For electric heaters, fill the tank with water before turning on the power. Running it empty may cause damage.
For gas heaters, check that the flame burns evenly and safely.
Conclusion
Putting in a water heater the right way makes it work well and last longer. Follow these steps and your heater will heat water safely while using less power.
If you notice leaks or inconsistent heating, timely water heater repair can extend its lifespan. In some cases, a water heater replacement may be the best long-term solution and getting a new one is also a best choice.
At Heng Plumbing, we provide expert solutions tailored to your needs. Whether it’s a new setup, maintenance or emergency repairs, their skilled team ensures a trouble-free experience with reliable workmanship. Visit Heng Plumbing to get quality plumbing solutions today.
Most water heater setups take 2 to 3 hours. If you swap an old heater, the job moves faster. If new pipes or gas lines must go in, the work stretches longer.
You can install a water heater by yourself if you gather the right tools and understand the steps. But gas connections and electric wiring need expert hands. If you feel unsure, then calling a professional keep everything safe and working the right way.
The right size depends on how much hot water your family uses.
- 1–2 people: 10–15 litres (storage heater) or small instant heater.
- 3–4 people: 25–40 litres (storage heater) or medium instant heater.
- 5 or more people: 50 litres or more (storage heater) or large instant heater.
The cost depends on the heater type, installation difficulty, and location.
- Instant water heater: Costs less to install because it’s a small and requires fewer modifications.
- Storage water heater: This may cost more due to extra piping, support brackets or drainage systems.
- Turn off water and power before starting
- Ensure good ventilation for gas heaters
- Use proper wiring to avoid electrical hazards
- Check for leaks before using the heater
- Flush the tank every few months to remove sediment
- Check the pressure valve to ensure it works correctly
- Inspecting pipes for leaks or blockages
- Keep the area dry to prevent rust
