 26 May 2025
A leaking pipe might look like a small problem but if you leave it, it can cause big trouble. Water damage, mould and high bills can all start from one drip. The good news is, many pipe leaks are easy to fix with a few simple steps. You don’t need tools or a plumber right away, just a calm approach, basic materials and a little time.
In this guide, you’ll learn how to handle a leak from start to finish. From turning off the water to sealing and checking the pipe, these steps will help you carry out a safe and strong leaking pipe repair that lasts.
Step 1: Turn Off the Water Supply
When you see water coming out of a pipe, stay calm and turn off the water right away. Find the little knob near the leak and twist it tight. If that knob doesn’t stop the water then go to the main water valve in your home and turn it off.
This stops the water from spilling out and gives you time to fix the problem safely. Water pressure can make a leak worse so shutting it off protects your pipe and keeps the mess small.
Never try to fix a leak while water is still running. You could get wet, and the leaking pipe repair won’t hold. Turning off the water is always the first and most important step because it gives you a clean start and stops the leak from growing.
Once you do this, you’re ready to begin your pipe leak repair with less stress and more control.
Step 2: Drain the Remaining Water
After you shut off the water then go to the nearest tap and open it. This helps to drain the pipe. The water inside needs somewhere to go and opening a tap lets it flow out. If water stays in the pipe then it may drip while you work and make your job harder.
Let the tap run until the pipe feels empty. If you hear bubbling, that means air is getting in and that is just what you want. It will make your plumbing leak fix easier. If the leak is near the kitchen, open the kitchen tap.
If it’s in the bathroom, try the sink or tub. Draining the pipe helps take away water pressure and that gives your repair materials a better grip. You don’t need any tools for this part, just good listening and careful looking. Now that the pipe is empty, you can fix the leaking pipe the right way.
Step 3: Clean and Dry the Pipe
Now that the pipe is empty, it’s time to clean it. Take a dry cloth and wipe the part where the water was leaking. Make sure it’s nice and dry. If you see dust, dirt or rust then rub it off. You need a clean spot to start your leaking pipe repair. If the pipe feels too smooth, use a bit of sandpaper to make it rough.
That helps the putty or tape stick better. Don’t leave the pipe wet. If water stays on it, your repair might not hold. Use a paper towel if needed and wipe all around the leak. Cleaning the pipe is not just about looking tidy but it helps you fix it better.
You don’t need fancy tools for this part. Just wipe, rub and check. A dry pipe makes the next step work right. Good cleaning means your pipe leak repair will last longer and stay strong under pressure.
Step 4: Apply a Temporary Fix
Sometimes you need to stop a leak quickly before you can fix it properly. That’s when a quick wrap is useful. Take a thick piece of rubber, cloth or even an old towel and press it over the leaking spot. Then use a strong string, wire or tape to tie it tightly. This quick wrap works like a bandage.
It stops water from spraying while you get ready for a real repair. This kind of fast leak fix is not forever but it gives you time. It works well if the leak is small or if you need to run and get more tools.
You can also use this wrap to stop a burst pipe repair from making a mess while you prepare. Always wrap it tightly, not loosely. This shows you where the leak is and gets the pipe ready for the next step.
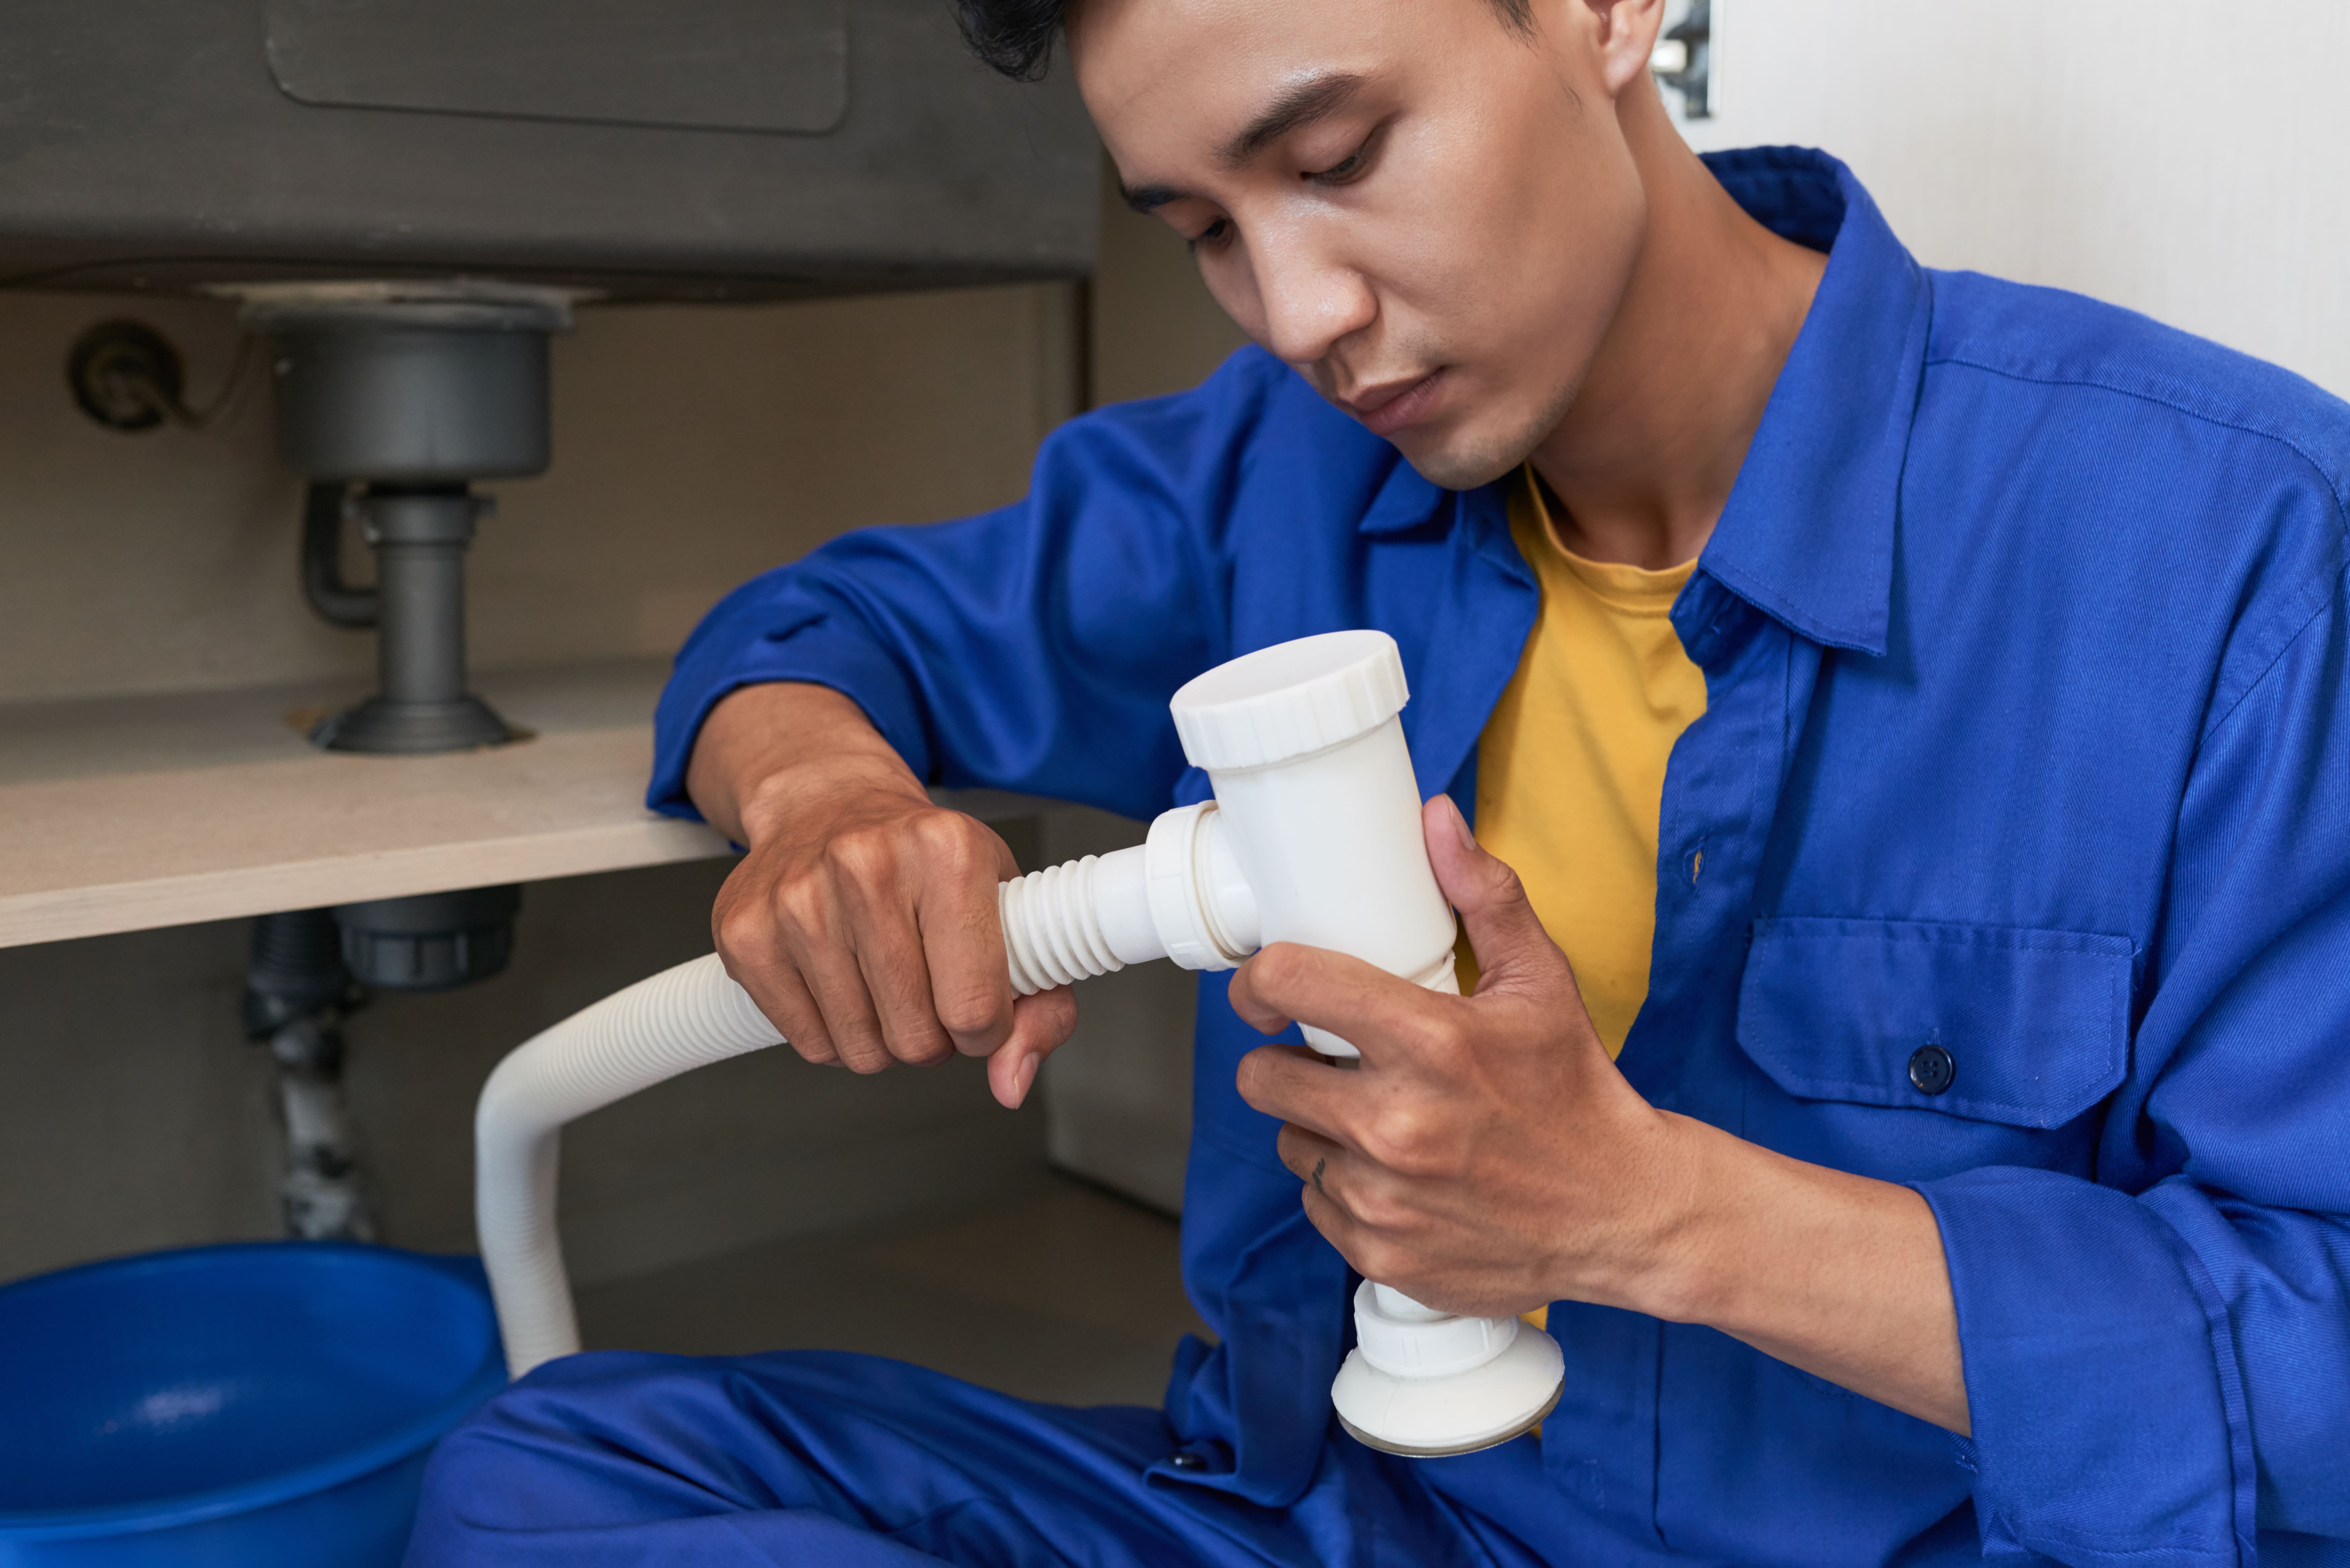
Step 5: Use Sealant to Cover the Leak
Take some pipe putty and roll it in your hands like play-dough. Make it soft and warm then press it right into the leaking spot. Push hard so it fills the hole. Squish it flat and smooth the edges so it sticks like glue.
This putty dries and hardens to stop water from coming out. It works great for small holes or cracks. Putty helps your pipe leak repair stay strong. You don’t need heat or tools, just your hands and the putty. Wait a little bit and let it get firm. Don’t touch it or move the pipe while it dries. Putty works on metal, plastic or copper pipes. It’s simple and safe. When done right, it becomes a strong cover that helps fix a leaking pipe repair for real.
Step 6: Wrap the Pipe for Added Support
Let’s make the pipe extra strong. After the putty sets, get a roll of strong tape or cloth. Start wrapping it around the pipe. Begin 10 cm before the leak and keep going 10 cm after. Wrap tightly and cover each layer halfway with the next.
This wrapping holds everything in place and stops the leak from coming back. It adds extra grip to your plumbing leak fix. Pull the tape firmly but not too tightly. Don’t let the wrap fold or bunch up. If the leak was big, the wrap helps hold the putty in place by keeping the pressure down.
This step is great for cracks or weak pipes especially during a burst pipe repair. When you finish wrapping, press it all down flat. It should look neat and strong.
Step 7: Let It Rest
Your repair needs time to get strong. Let it rest. Put down your tools and give the tape and putty time to dry. Don’t touch the pipe or turn the water back on too fast. Drying is part of the fix. Some putty dries in 10 minutes while others need an hour. If it’s cold or damp, wait longer.
Check the label on your putty if you’re unsure. Even a quick fix leaking pipe job needs time to work right. You worked hard to patch, shape, and wrap so now let the materials do their job. If you rush this step, the leak may come back.
Just be patient because waiting helps your leaking pipe repair stay strong.
Step 8: Turn the Water Back On and Check
Now it’s time to see how you did! Go back to the water knob. Turn it on slowly. Don’t rush. Watch the pipe as the water comes back. Look closely at the part you fixed. Use your hand or a dry tissue to check for drips.
If it feels wet, press a tissue on it again and see. If it’s dry, you fixed the leak. If water still comes out, you may need to add more putty or tape. Sometimes, a pipe leak repair needs a second try.
If it still leaks after that then call someone who fixes pipes. You may need to replace the broken piece. But if it’s dry and clean, your fix leaking pipe job worked.
Understanding the Causes of Pipe Leaks
Leaking pipe repair is essential to prevent small leaks from becoming major issues. Pipes start leaking when the seals wear down, metal rusts, or fittings shift out of place. Excess pressure inside the pipe can also trigger small cracks or bursts. Pipes in old homes often decay over time. A sudden drop in water pressure or mold growing on the wall might indicate a water pipe leak. Spotting these signs early stops worse problems from creeping in. You may engage plumbing services to get the issue resolved with peace of mind.
Common Mistakes to Avoid When Repairing a Leak
Not Shutting off the Water
Letting water run during repairs causes spills and weakens sealants.
Failing to Dry the Pipe
Water on the pipe blocks the seal from sticking properly and causes it to peel off.
Using the Wrong Materials
Some tapes or putties don’t cling well to certain pipe materials. Choose the right one to make the fix last. Leaking pipe repair requires strong materials to prevent frequent leakage problems.
Ignoring Pipe Cleaning
If dirt or rust stays on the pipe, the benefit of the repair weakens fast. Always scrub the pipe clean before sealing.
Why Regular Plumbing Maintenance Matters
Frequent checks help spot pipe issues early. Finding loose fittings, small drips, or rust marks enables you to fix issues before they worsen. Timely plumbing services help keep pipes clean, strong, and working without leaks. They also help stop water pipe leaks from sneaking up unnoticed. Looking after your system often makes sure water moves smoothly.
What Happens If You Ignore a Pipe Leak?
Leaving a leak unfixed can cause more than a wet floor. Over time, a small water pipe leak can damage your walls, ceilings and floors. Mould starts growing where moisture lingers. This leads to health issues and high clean-up costs. Leaks also weaken your pipework, turning a minor issue into a burst pipe emergency.
A rising water bill often signals hidden leaks, as even small drips waste litres daily. Scheduling leaking pipe repair early prevents damage from spreading and protects your property. With timely plumbing services, you avoid structural issues and save money over time while keeping your home safe and stable.
Simple Ways to Maintain Your Pipes Year-Round
Keep your plumbing system strong with a few basic habits. These steps can help stop a water pipe leak before it starts:
- Check for leaks under sinks and around taps.
- Don’t pour grease or oil down the drain.
- Use strainers in sinks to catch hair and food bits.
- Flush only toilet paper – avoid wet wipes or other items.
- In colder months, insulate pipes to stop freezing and cracking.
Regular care keeps your water flow steady and avoids pressure build-up that can lead to cracks. If you do spot early signs of a leak, act fast with a proper leaking pipe repair to keep it from spreading. Reliable plumbing services can also advise you on upgrades to older pipework.
Routine Plumbing Checks You Can Do Yourself
You don’t always need professional plumbing services for small checks. Doing quick inspections at home can prevent trouble:
Monthly Checks:
- Run water and check under sinks for drips.
- Inspect washing machine hoses for cracks.
- Check toilet bases for leaks or loose fittings.
Quarterly Checks:
- Look behind appliances for damp spots.
- Examine visible pipes for signs of a water pipe leak.
- Test water pressure – sudden drops can point to hidden leaks.
Catching problems early keeps repairs simple and affordable. If you spot a leak or suspect pipe damage, contact trusted plumbing services immediately for help.
Conclusion
Repairing a leaking pipe may seem like a big task but with the right steps, it becomes manageable and even straightforward. By acting quickly, preparing the pipe properly and using basic sealing techniques, you can fix a leaking pipe effectively. These eight steps offer a practical solution for minor leaks and small bursts. They help prevent further damage and restore your plumbing system to good working condition. If the leak continues or worsens, don’t hesitate to call a professional.
At Heng Plumbing, you’ll find trusted professionals who handle everything from small leaks to major repairs. We offer quick, reliable service across Singapore to keep your plumbing in top shape.